Quantcast
Channel: Cookaroo
Viewing all 212 articles
Browse latest View live

Restaurant Review I Monkey Bar, CP

$
0
0

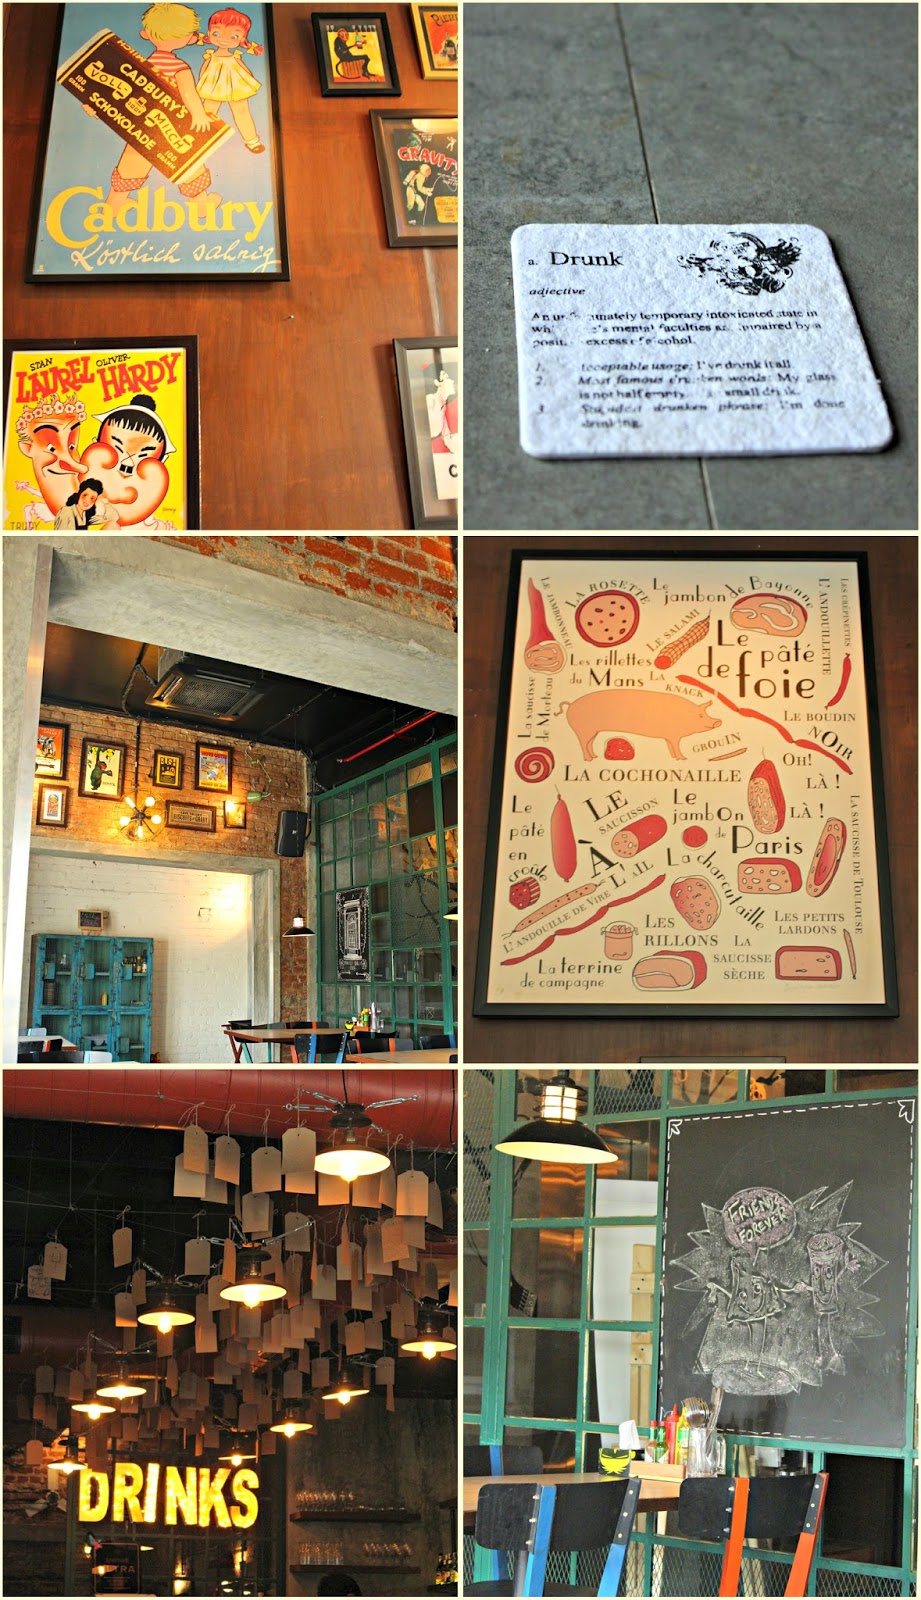
Every once in a while comes a place that you just cannot have enough of. Monkey Bar is one such place. When it opened in Bangalore, us Dilliwalas couldn't wait for it to open in the capital. And when it opened in Delhi, we couldn't wait for it to spring another branch somewhere so that we didn't have to wait in lines.
And it didn't let us down. Opening in the heart of the city, Monkey Bar in Connaught Place, has found a perfect spot for its redux version. Nestled in the corner, overlooking the Outer Circle, this Monkey Bar gives you a fantastic view of the hustle bustle in CP. 

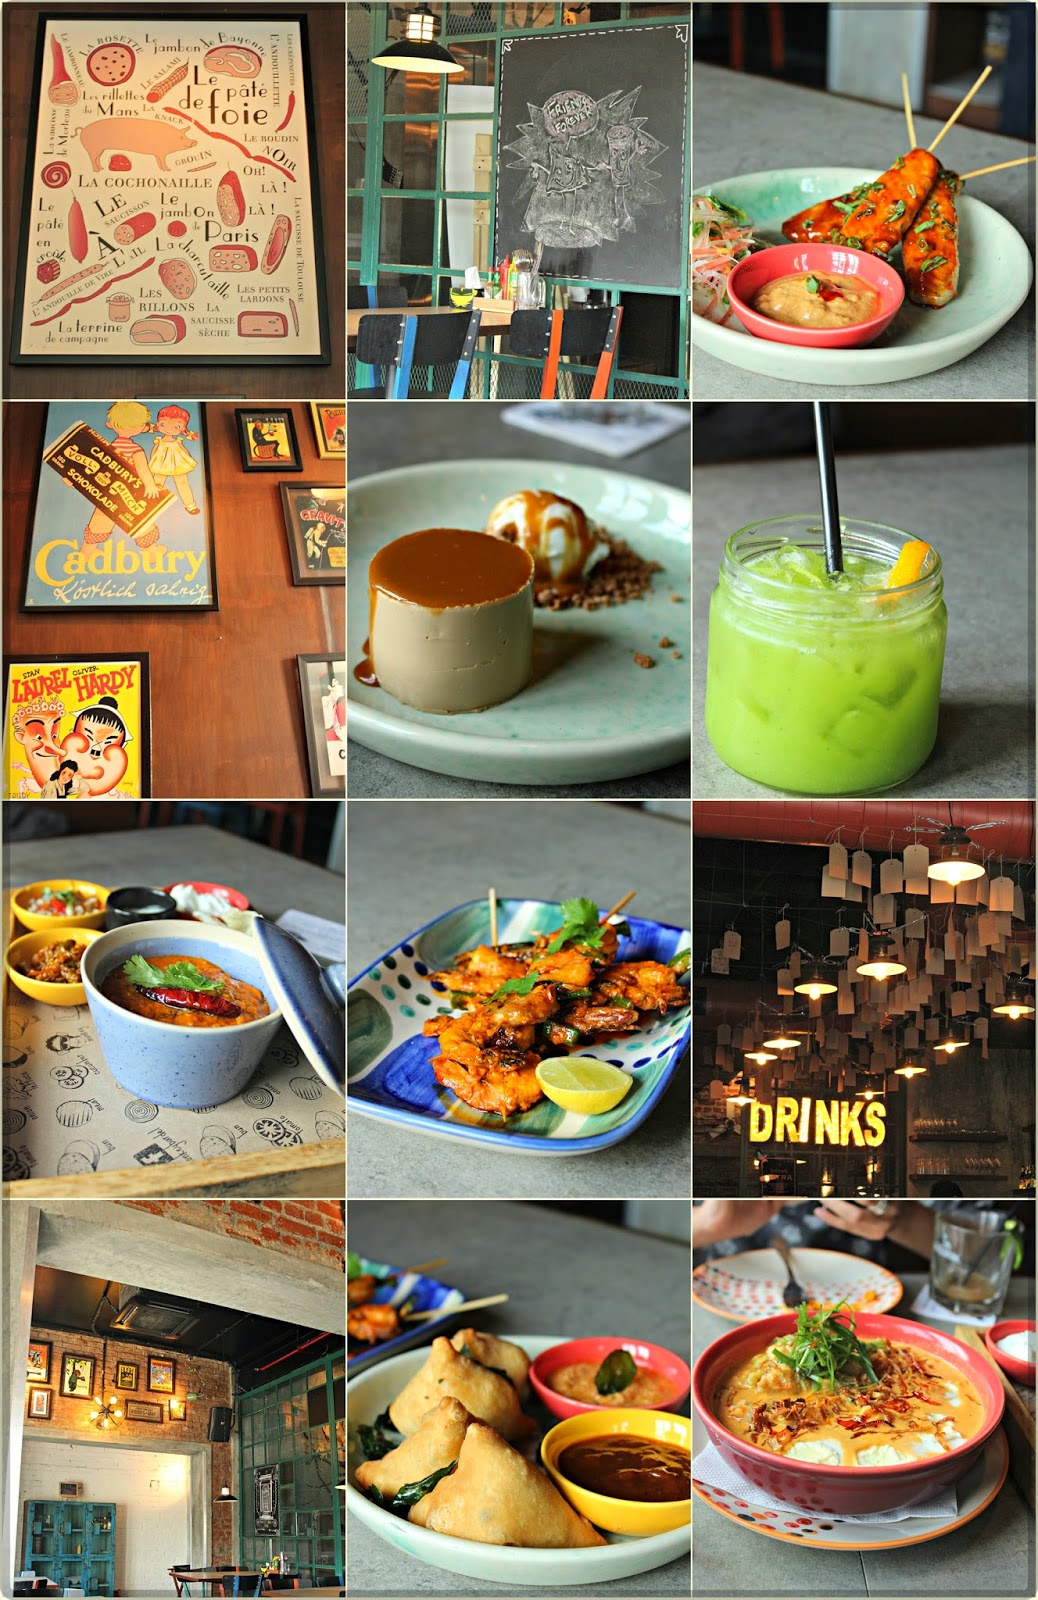
Ofcourse, coming back to Monkey bar meant that you wanted to try something new but still stick to the old favourites as well. So we knew pretty much what we wanted to drink as soon as we sat down - the Shazia Imli and Mangaa. Both fantastic cocktails that were sweet and sour and just perfect for the slanting winter sun.


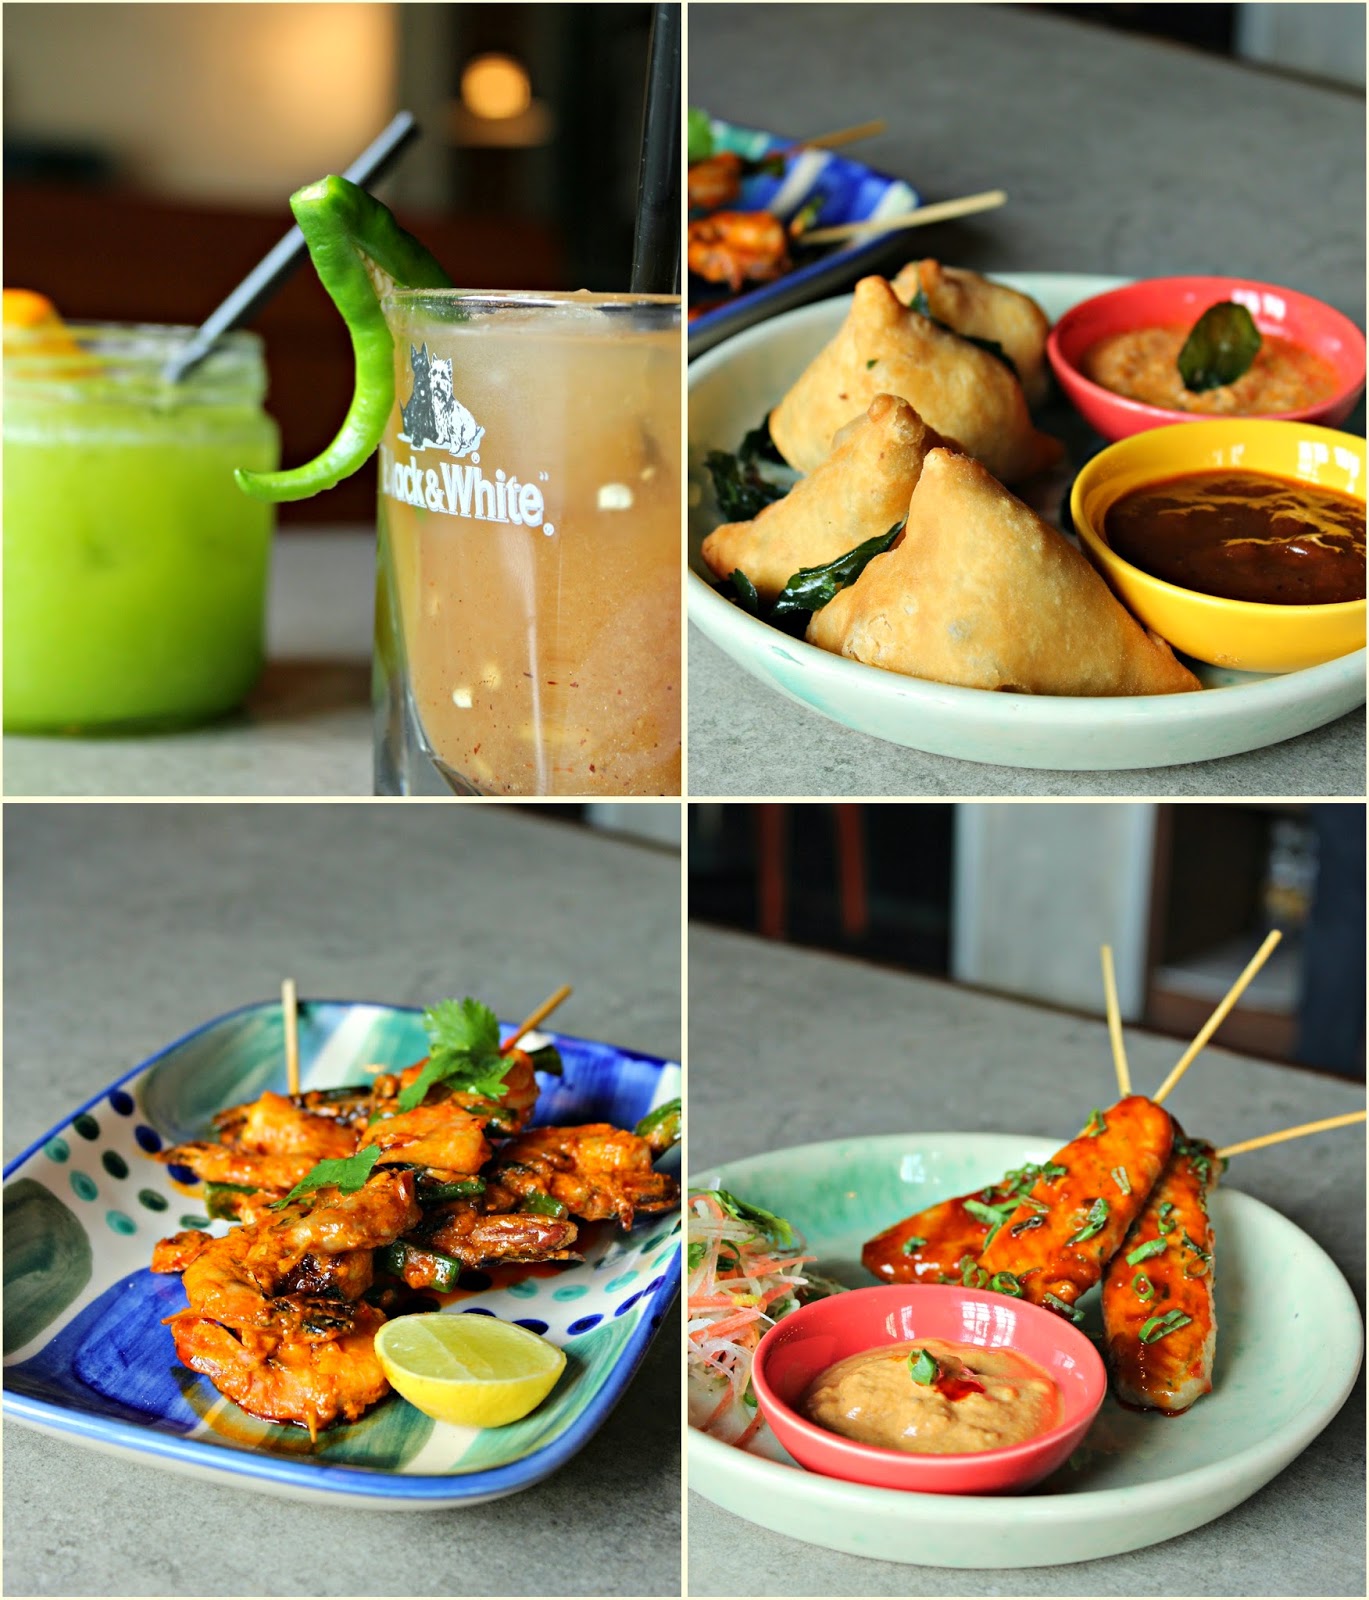
We started our meal with three of the newer things on the menu - Pat Pong Chicken Skewers, Bang Bang Prawns and the Malabari Keema Samosa. 

Of the three, the Bang Bang Prawns were our favourite, the addition of the curry leaves gave the prawns almost a sort of gassi flavour - Manglorean flavours - that they were just succulent and fantastic. The Malabari Keema Samosas also had a beautiful crisp curry leaves stuffed inside that gave it a great texture, almost like a crackling in the mouth. 


We wanted something soupy next - so the Mobar Laksar was up next. I loved the bits of vegetables that were in the shrimpy broth Flavourful and hearty, we should have really stopped at that. But no, instead we also opted for the Waffle Sandwich. 

And here was where we had a bit of an issue - I love my waffles. People who know me, will attest to it, so a soggy waffle is a big no-no for me. As is too much fat on a strip of bacon.  Somehow the combination of a soggy waffle and bacon with so much fat was a big turn off. And considering that so many places are now doing a waffle sandwich, maybe Monkey Bar, should up their game a bit and make a sandwich that's well, atleast not soggy.


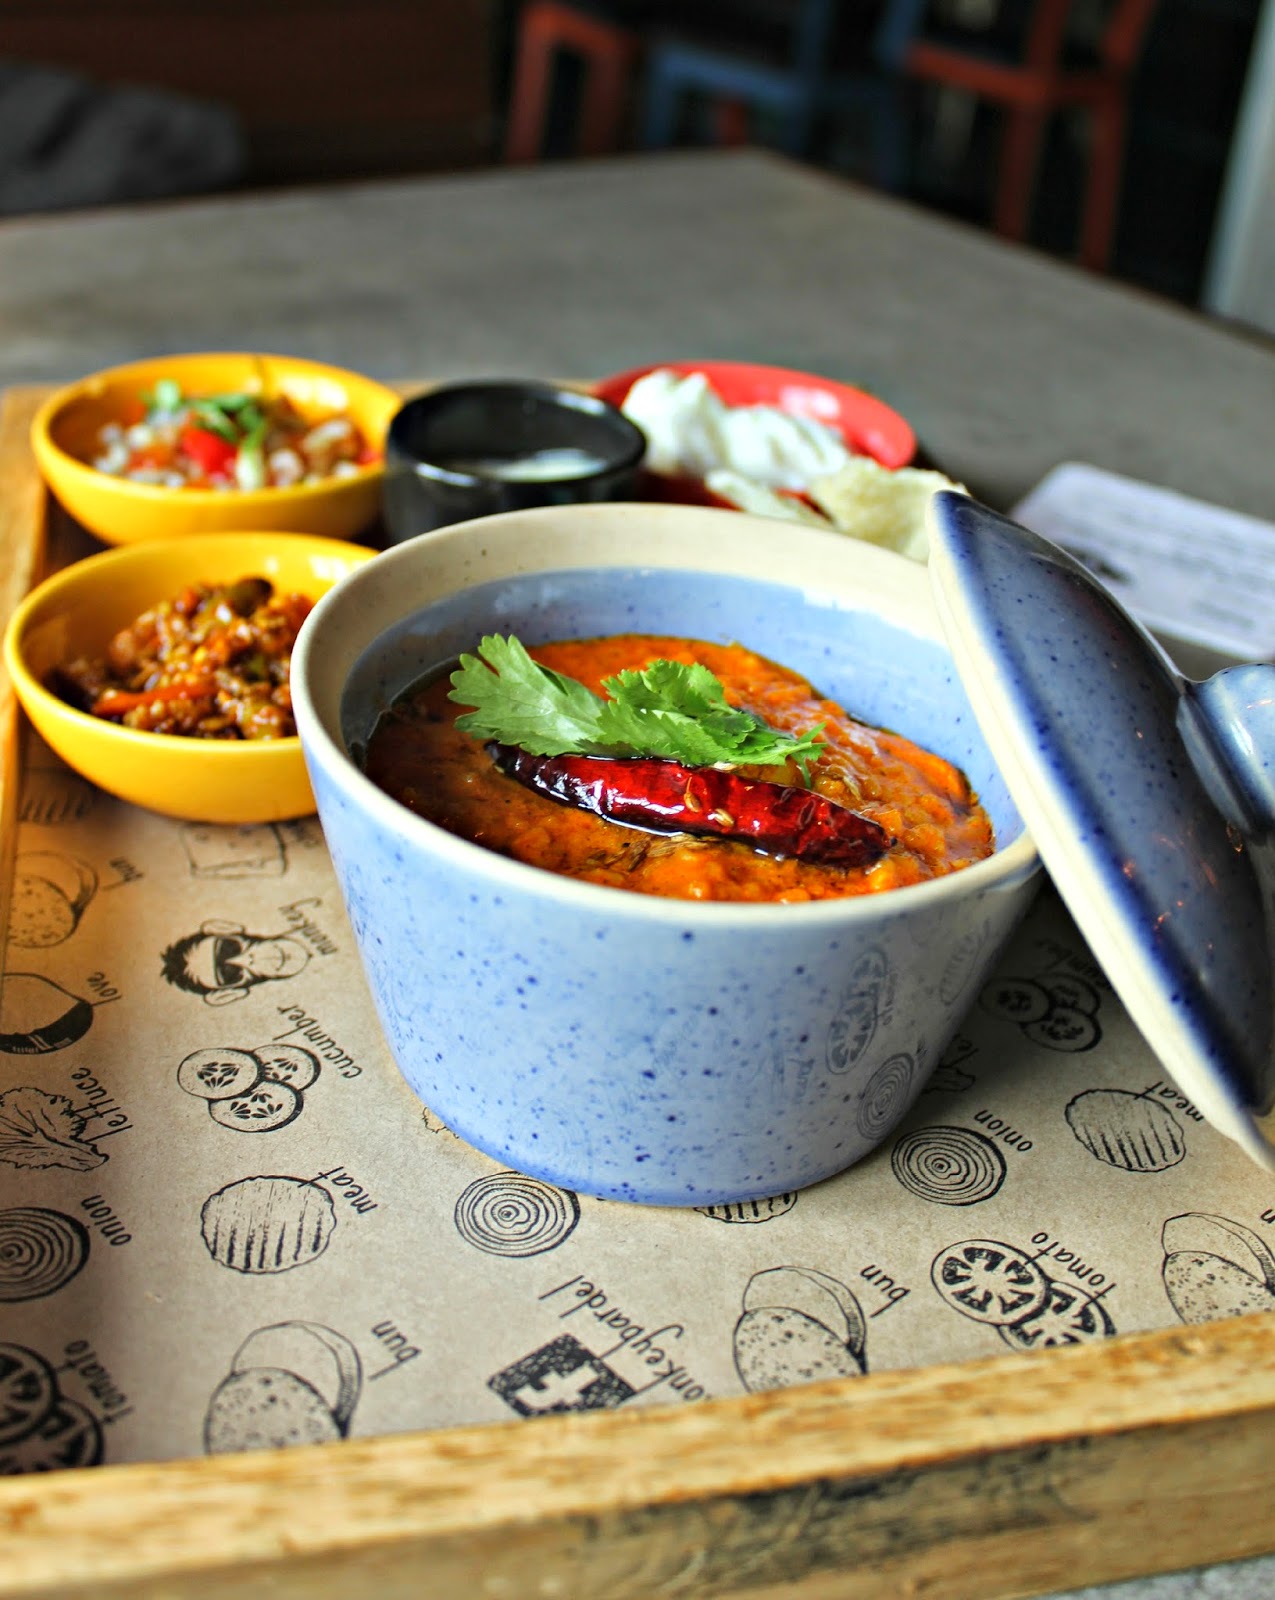
But the thing that really was outstanding was the Butter Chicken Khichadi - part risotto, part makhani and rice, it was just fantastic. Served with pappadums and a salad, it totally made my day. It was warm, comforting and so delicious. Something I can see myself ordering over and over.


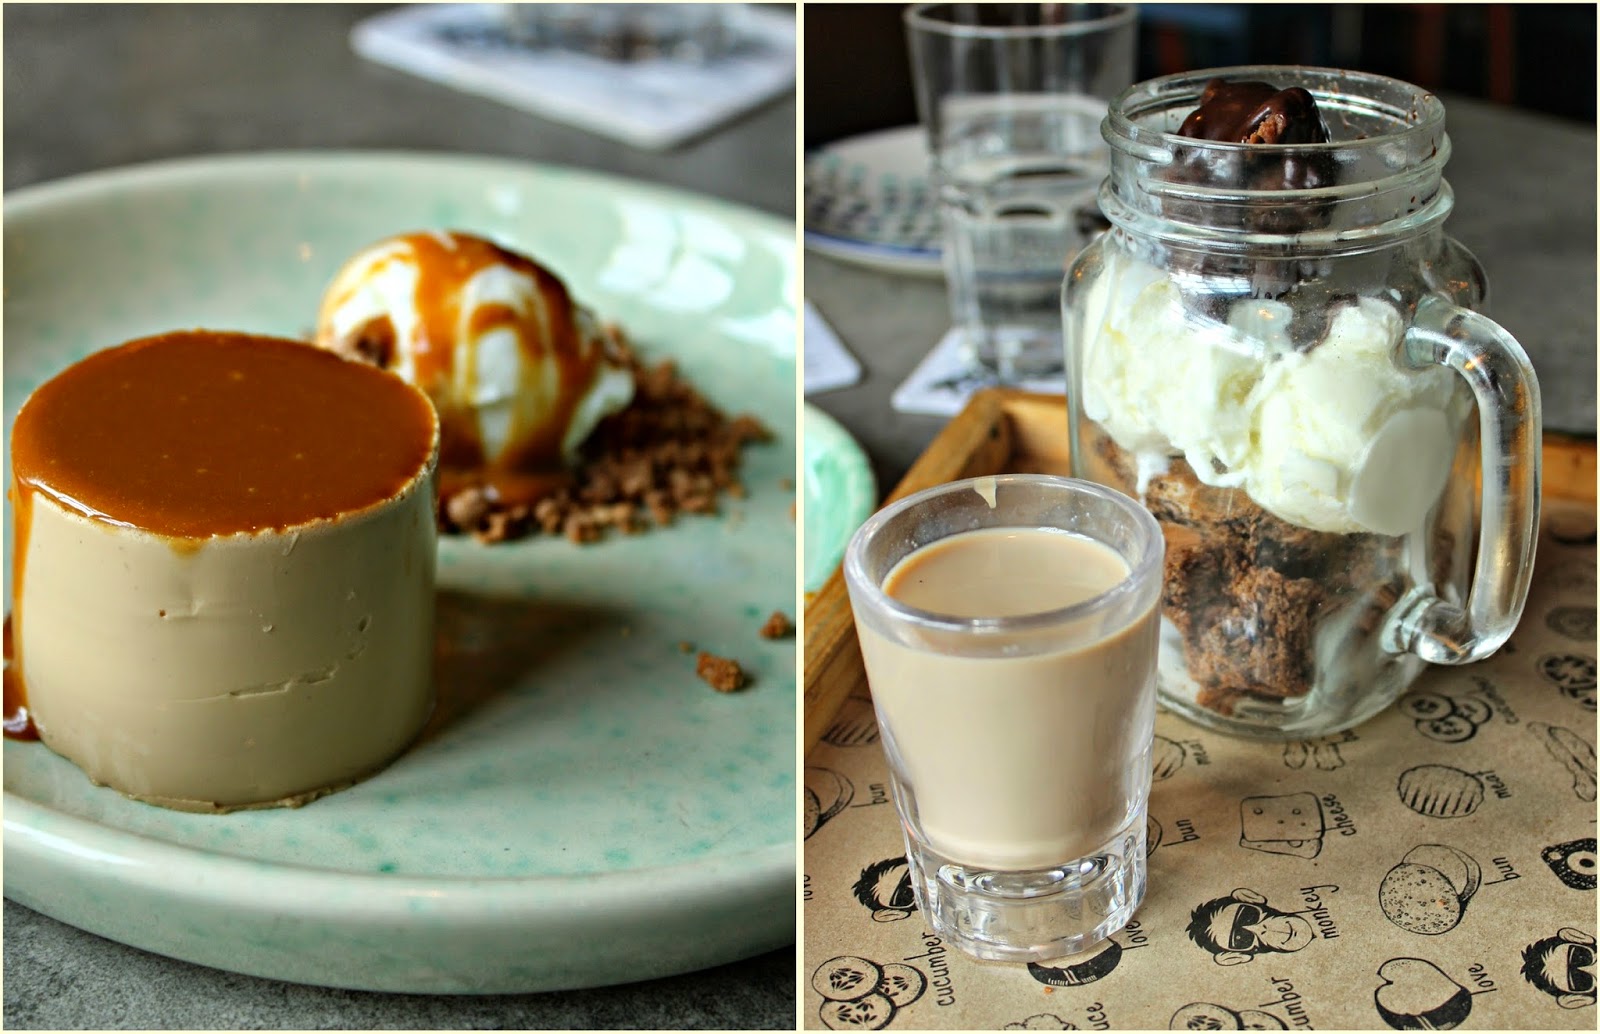
As if that wasn't enough, it was time for dessert - the Filter Coffee Panna Cotta and the Mobar Sundae cup - were up. I love love loved the filter coffee panna cotta, it had the most beautiful robust flavours of coffee we just couldn't stop eating. The Sundae though could have done with a bit of a something fudgey, especially since it was supposed to be a take on the Nirula's Hot Fudge Sundae.

All in all, it was an afternoon well spent. Good food, great company and gorgeous views, could you really ask for anything more?


Salad I Chickpea Cucumber & Feta Salad with Mediterranean Spices

$
0
0


It's been a while since I've posted a salad. Which is stupid because I make salads a lot. I mean, really a lot.

The thing about salads is that trial and error is a great way to go about them. And if you keep seasonal produce in mind, then well, you know you'll have a hit in your hands.

Ofcourse I love my leafy salads, so plenty of argula or rocket, watercress and iceberg lettuce always find their way into my refrigerator. But sometimes, you find a salad that's so easy to do that you can probably do without them leaves. This is one of them.

When my friend Niv, came this time from Dubai, she got me lots and lots of Zaatar and Sumac -Mediterranean Spices, that deserve a pedestal of its own. Oh, don't get me wrong, ofcourse they already are, I meant in Indian homes.


A mix of herbs, Zaatar has strong thyme flavours (since it's got bits of basil thyme and regular thyme) mixed with sesame seeds. It's sharp yet slightly pungent makes for excellent spice rubs for all kinds of meat and fish. While the sumac is a dried berry powder that is typically used as a souring agent. Ofcourse, you can get both these two in India now, but the middle-eastern versions, are just far more superior.

Coming back to the salad - this is a great way to use up leftover chickpeas and as long as you don't add that bit of salt and lemon, it'll keep for a few days as well. Feel free to make adjustments, but this is great as it is. Also you can omit the feta and add goat cheese instead, or well no cheese, either ways it's just wonderful.


Chickpea Cucumber & Feta Salad with Mediterranean Spices
Serves 4

Ingredients

2 tablespoons walnuts
3 tablespoons sugar
200 grams soaked and boiled chickpeas
1 cup Pomegranate seeds
100 grams Feta cheese
2 medium cucumbers
1 tsp zaatar
1 tsp sumac
2 tbslp olive oil
Lemon juice
Salt to taste

Method
1. Start by caramelising the walnuts. In a saucepan melt the sugar until it browns and all the walnuts to it. Using a spoon fish out the walnuts and leave them on a piece of butter paper to harden. Keep aside.
2. In a separate bowl add the chickpeas and the pomegranates and mix with the olive oil and sumac and zaatar. Keep aside.
3. Chop the cucumbers, preferably with skin on and seeds removed and add to the chickpeas mix. Add the feta cheese as well.
4. At this point, this mixture can be kept in the refrigerator for over two days.
5. Just before serving, toss in the lemon juice and salt and add the caramelised walnuts on top.


Food Festival I Shahajahanabad ki Sair. At Ssence, The Suryaa Hotel

$
0
0


There's something magical about food that tell stories. And not just ordinary stories, but tales of kings and kingdoms and things they liked to eat.

The Shahajahanabad food festival a Ssence at the Suryaa Hotel is nothing short of magic, not only because of the history it's seeped in but also because of the person who was making it. Food from the bylanes of Old Delhi cooked  by Nazish Jalali, a lady who's had connections with a long line of royal khansamas.

Nazish Jalali is no ordinary woman. Despite no formal training, she's a Rampuri woman who's managed to collect recipes of the Mughal era that are on the verge of being forgotten, . And then has cooked up a storm that's truly fit for the kings. Home-style cooking that obvious won over the kings.


On the night, we went to attend the food festival, the spread reminded you of an old fashioned daawat. Served on beautiful silver crockery, you knew that you were going to be pampered. A platter of mutton seekh, chicken seekh and kachche kheeme ke kebab were brought out. Along with kathal ki tikki and the bhutte ki tikki under the vegetarian umbrella.

Osama Jalali, Nazish's son and the curator of the event explained how at home however these kebabs were made on the sigri and therefore retained all the fat and all the flavour.Unlike in the hotel, where it was made in the tandoor where it lost a significant amount of flavours. Yet the kachche kheeme ka kebab was stellar. Midly spiced with a pronounced fragrance of the badi elaichi, it was realy quite excellent.

As the main course was laid out, we heard tales of the mother and son's cooking escapades - about five-year-old Osama standing on the edge of a tandoor looking down at it, about a daughter who learnt cooking from the royal cooks and a new bride who cooked for her father-in-laws guest.


Aloo Gosht, Chicken Korma and Mutton Nihari were set out in front of us. And a mildly spiced parwal was piled onto our plates. Hot sheermals and khameeri rotis were laid down for us as we plodded our way through the curries. The chicken Korma was exceptional - curd based gravy that was scented with cardamon and tomatoes, I could have eaten it by the bowlful. The aloo gosht was superb too, light and easy on the palate, this was also Nazish Jalali's speciality. 

The Nihari though deserves an paragraph on its own. Simmered over for six hours, the mutton was so succulent that it melted in the mouth. Spiced generously with fresh ginger and coriander, it was one of the stalwarts from the festival. 


Steaming hot plates of biryanis were brought out. Nazish told us that they served it with a spicy garlic chutney instead of raita. The three coloured rice was mild, and not oily, so home-style that it won my heart over.


For dessert we had the zarda rice and sevaiyyan, both tasted fab and was a great end to the this fantastic meal. 

The food festival is on till December 21st, so go there as soon as you can.

Baking I Linzer Cookies with Strawberry Jam

$
0
0


I've been wanting to post a Christmas recipe for the longest time now. Something, anything. But it still hasn't felt like Christmas to me as yet. I suppose that's because my tree hasn't gone up and frankly I'm in no mood to celebrate either.

It's been a tough year - moving all over again - trying to figure out what I really want to do - and starting from scratch. Just a tough tough year. But that's for another time.

So as I sit here and reminisce, I can't help but crave for something warm to drink. Something to calm the nerves, something to soothe. But what I really want is something to dunk into that warm thing. A piece of rusk, a biscotti or a cookie. Anything that can really make me feel slightly festive and well, content.


The first time I ate a Linzer cookie, was when I sneaked it off a Christmas display. There was this gingerbread house that housed some fun looking things to eat including a cookie that was drenched in jam. One bite and realised that the cookies really hit that spot. Almondy and jammy, they were just terrific.

Named after the Austrian city Linz, the cookies are an off shoot of the Linzer Torte. Short crust pastry with jam baked in. The cookies are pretty much similar - some lemon zest some cinnamon, lots of almonds and then topped with jam. And these are made mostly during Christmas time.

My Linzer cookies were made one night when I was so troubled by the world and I needed to make something to calm my nerves. The only jam in sight I had was a Strawberry and White Pepper preserve and I just needed to pop something sweet in my mouth asap. The only catch with jamming the cookies is that they get soggy super soon, so I suggest you make them and jam right at the end.


Linzer Cookies with Strawberry Jam
Adapted from Joy of Baking

Ingredients

1 cup (150 grams) whole almonds2 cups (260 grams) flour 1/2 teaspoon (1 gram) ground cinnamon1 pinch nutmeg1/2 teaspoon (2 grams) saltZest (outer yellow skin) of one small lemon 1 cup (226 grams) butter3/4 cup (150 grams) sugar , divided1 teaspoon (5 grams) vanilla extract2 large (40 grams) yolkTopping:1/2 cup (60 grams) confectioners' (Icing or Powdered) Sugar1/2 cup Strawberry jam

Method1. Preheat your oven to 350 degrees F (180 degrees C) with the oven rack in the center of the oven. Place the almonds on a baking sheet and bake about 8-10 minutes, or until lightly browned and fragrant.
2.  Remove from oven and once the nuts have cooled, place in a food processor, along with 1/4 cup (50 grams) white sugar, and process until finely ground. 3. In a separate bowl, whisk or sift together the flour,nutmeg,  cinnamon, salt, and lemon zest. 4. In the bowl of your electric mixer (or with a hand mixer), beat the butter and remaining 1/2 cup (100 grams) sugar until light and fluffy (about 2-3 minutes). 
5. Beat in the vanilla extract and egg yolks. Finally, beat in the ground almonds and then the flour mixture. Divide the dough in half, cover each half with plastic wrap, and refrigerate until firm (30-60 minutes, or up to two days).6. Preheat oven to 350 degrees F (180 degrees C). Line two baking sheets with parchment paper.Remove one ball of dough from the refrigerator. On a lightly floured surface roll out the dough until it is about 1/4 inch (.5 cm) thick. Using a 3 inch (7.5 cm) cookie cutter (star, round, square, heart, etc.) cut out the cookies. 
7. Place the cookies about 1 inch (2.5 cm) apart on the prepared baking sheet. Use a smaller cookie cutter to cut out the centers of half of the cookies on the baking sheet. 
8. Reroll any scraps and cut out the remaining cookies. Repeat with the second ball of dough. (Note: If you find the cookies are soft, place the baking sheets with the unbaked cookies in the refrigerator for about 10 minutes to chill the dough. This will prevent the cookies from spreading and losing their shape when baked.)
9. Bake the cookies for about12 minutesor until lightly browned around the edges. Remove from oven and place on a wire rack to cool.

Assemble Cookies:  Place the cut out cookies on a baking sheet and lightly dust the tops with powdered sugar. Spread a thin layer of jam on the bottom surface of the full cookie (top of cookie will face out). Place the cut-out cookie on top and gently sandwich them together. Using a small spoon or a piping bag, fill the cut-out with a little more jam.

The filled cookies will soften when stored. If you want the cookies to stay crisp, assemble the day of serving. The assembled cookies can be stored in the refrigerator, in an airtight container, for several days.


Baking I Cranberry and Chocolate Chip Christmas Cake. AKA The easiest Christmas Cake You'll Ever Make

$
0
0


It's not too late to make your own Christmas cake. Yes, you read that right. Because this cake requires no special ingredients  and no soaking. Yes it will take you about 20 minutes to put together, but it's only that much time and not a minute more to make this finger-licking delicious cake with just the right hint of spices. And... there's chocolate in it.

You know the best part about this cake is that you can put in just about anything that you have lying around. Don't have cranberries, omit them completely. Don't have almonds, put cashew instead. Don't want booze just up the coffee instead. And don't want chocolate, well, who doesn't want chocolate.

This recipe makes the most moist fruit cake ever. I would recommend that you put in three different kinds of dried fruits - I used prunes, raisins and cranberries in this - but black currants, figs, apricots, dried mangoes, dried strawberries, currants - just about anything will do. And if you don't have three kinds, just cut the recipe in half and feel free to use just one fruit and one nut.


What I love about this cake is its ability to retain moisture for a super long time. Because the fruits are cooked in a bit of coffee and rum (You can just omit the rum and up the coffee and add a bit of orange juice instead), they just breathe out the excesses very gently.  Plus with the addition of aromatics such as cinnamon, dried ginger, nutmeg and clove it just leaves you warm and fuzzy inside.

I suggest that you multi-task while you make the cake. In the sense, while the fruits are in the microwave with the liquids you toast your nuts. And while your cooling your fruits and nuts down, you measure out the spice mix and the dry ingredients.

Once the cake is baked, you just need to let it rest for an hour before it cools completely. And after that, just devour.


Cranberry and Chocolate Chip Christmas Cake
Makes 20 generous slices or two loaf  tins

Ingredients

To quick soak and cook
100 grams raisins
100 grams prunes
100 grams cranberries
1/4 cup coffee
1/4 cup rum / orange juice

To toast
50 grams almonds
50 grams walnuts

For the spice mix
1 tsp ground cinnamon powder
1 tsp ground ginger powder
1/8 tsp nutmeg
1/2 tsp clove powder

For the cake
100 grams butter
100 ml oil
4 eggs
2 tsp vanilla extract
100 grams dark chocolate chip
1/4 cup rum / orange juice / cointreau
2 1/2 cup all purpose flour
1/8 tsp salt
1 tsp baking powder
1 1/2 tsp baking soda
1 tablespoon corn flour

Method

1. First, in a large bowl measure out raisins and cranberries. Chop the prunes and throw them into the same bowl. Measure out the coffee and the rum/orange.
2. Put the bowl in the microwave and zap it for four to five minutes. Alternately you can put all this in a saucepan and let it cook for five minutes on the gas. Set aside and let it cool.
3. Meanwhile, toast the walnuts and almonds and set aside
4. Now, measure out the spice mix and keep aside.
5. In a large bowl beat the oil and butter together. Add the eggs to it and all the spice mix and vanilla extract as well as the additional rum /orange juice/ cointreau. Beat well.
6. Add all the dry ingredients - flour, salt, baking powder, baking soda and corn flour - just mix until incorporated.
7. Add all the dried fruit mix, and the toasted nuts and the chocolate chips. Stir until incorporated.
8. Pour into parchment paper-lined tins,  bake at 180 degree centigrade for 55 to 65 minutes or until a skewer comes out clean.
9. Serve with additional ganache or a drizzle of icing sugar.


Restaurant Review I Kathputhli

$
0
0


The simplest meals are sometimes the most joyful. That's exactly how it was with Kathputli. Home-style vegetarian Rajasthani and Marwari food in an all-you-can-eat style thali. Filling, comforting and delicious.

Having grown up on the thali-culture down south, I'm a sucker for all things that come in that shiny steel plate. A thali means a large sample of the goodies of the day. A thali means you get to taste everything on the menu and yet opt to eat what you like the best. For a glutton like me, this has always been the perfect answer.

We started our meal with a warm corn shorba, which was like a thin-yogurt curry with a lovely tempering of spices. Piping hot and mildly sweet and spicy, this was quite the appetite whetter. As our shiny thalis were laid out, the chutneys came out first - mint, tamarind and garlic - all equally good. With crisp roasted pappads, it was only moments by the time we'd chomped down our crispies.


The menu at Kathputli changes every week, so this week our starters included Khaman and a matar ka samosa. The Khaman was slightly bland but did well after a few dunks in the chutney. I loved the matar ka samosa, as the peas were fresh and had a sweetness that it lends itself to only in the winters. 

Next up was the raw papaya salad - almost like a som tam - it had been tempered with curry leaves and mustard leaves to give it that Indian flavour. This was truly my favourite of the day. The traditional Ker Sangri also made its way to our plates - which we saved to eat with our khichadi later.

Dal Baati Choorma - the three things I'd been waiting for arrived. I loved the baati - it had been dunked in ghee but was still crisp on the outside and soft on the inside. So delicious. The Dal could have been a lot more flavourful, it lacked a sort of a punch, that I guess a bit of salt and tartness could have helped. 


As our bowls started getting filled up - we ended up with gatta curry, gujrati kadhi, dahi aloo, raita, methi malai matar and hot phulkas and bajre ke roti. I really enjoyed everything, but of the lot the kadhi and the dahi aloo were really stalwarts.

We ended our meal with a good helping of shrikhand - or sweetened yogurt with saffron and pistachios and realised that we hadn't eaten very greasy food. Instead this was food from our homes, food that reminded of  the years bygone. This was great home-style cooking.

Turned out it was a Maharaj / a home-style cook who had been cooking. I suppose there's something left to still say about good old fashioned simple food. The kind that really makes you happy.


Baking I Gluten-free Hot Strawberry Souffle

$
0
0


I have a slight obsession with strawberries. Considering we only get them in India in the winters, I stock up on them like no tomorrow, so that they at least last me till late spring.

This year though, the strawberries have come early. Normally we see them sometime in January, this time they've creeped up on us in December. But no matter when they come I know I have to just do something with them.

One of my favourite ways to eating strawberries is just macerating them in a bit of balsamic vinegar and sugar. In fact this Vanilla bean pudding with balsamic strawberries always makes it to my must-have strawberry dessert every year.  As is my Strawberry Citrus tart, which I totally adore.


I also love using frozen strawberries to make Frozen yogurt and Granita . Sometimes I mix it up with other fruits, other times I just love them plain. I've used them in baking too - in loaf cakes such as the Lemon Strawberry cake or cheesecakes such as Mini lemon cheesecakes with Strawberry compote - but I haven't ever used up the pureed fruit.


This recipe of the hot strawberry souffle is from pureed fruit. Just a bit of fresh strawberries, pureed cooked down a bit with sugar and then folded into stiff egg whites and baked. Eaten hot, it's like picking a warm berry out of its hedge. The strawberry souffle is so light and so delicious, it just makes for a perfect warm winter dessert. Served on the side with some fresh strawberries, you could just live in that ramekin.

I did add a bit of balsamic in my strawberries, you could instead just add some lemon juice. But a friend of my gave me a bottle of this barrel-aged chocolate balsamic, that just take these berries to another level.  You have to cook the strawberries, otherwise they'll get too runny and you'd end up with a soupy souffle, which is, well, not nice at all.

Don't be daunted by the word souffle, as long as you eat it right out of the oven, there's very little chances of it falling, and even if it falls, it's really quite ok, you'll still be getting a delicious dessert.


Hot Strawberry Souffle
Serves 2

Ingredients 
200 grams strawberries
4 tblsp sugar
1 tblsp corn flour
1 tsp balsamic vinegar / lemon juice
4 egg whites
1 tsp butter


Method

1. Butter your ramekins well. Keep aside
2. Hull the strawberries and puree in a blender. Add it into a non-metal saucepan with the sugar (adjust sugar according to how sweet your berries are). Cook until the strawberries turn a deep shade of pink and most of the water evaporates.
3. Stir in the corn flour and the lemon juice. Set aside.
4. In a clean bowl, whisk the egg whites till the form stiff peaks. Stir in the strawberry puree until just combined.
5. Pour into buttered ramekins. And bake for about 12 to 15 minutes. Serve hot


Dessert I Buttermilk Lemon Panna Cotta with Balsamic Strawberries

$
0
0


Happy New Year Peeps! Here's to making this year count and making a difference! I wish we had something we could clink. Oh wait, we do!

I had to start this year with a dessert in a glass only because we need to clink something. It has to be festive enough. Something pretty enough. And therefore I present a really simple, and really pretty dessert - the panna cotta.

My first panna cotta was in a restaurant in Pondicherry. So tiny and rustic, I'm fairly sure it doesn't exist anymore because for the life of me, I cannot remember its name. That said, what I do remember was the eggplant parmigiana and the Cocoa panna cotta. Velvety smooth, so creamy on the palate, I remember the panna cotta as a mousse-like jelly. Okay, okay, that just sounds wrong. What I mean it was just such a different texture that I was hooked.


When I asked the lady who owned the restaurant how its made, she said oh just four things - cocoa, cream, sugar and gelatin. How cool is that, I thought to myself. And then I had to make it myself

Making a panna cotta is really no rocket science. Just a bit of sugar, cream, whatever flavours you want and gelatin or agar agar. I've realised that if you're making a non-chocolate or coffee pannacotta, substituting half the cream with yogurt or buttermilk always makes a big difference.

For this pannacotta too, I used half buttermilk and half cream to make a lighter and truly delectable dessert. I used a bit of dark chocolate balsamic in mine and infused the cream with lemon peels, so that the oils from the lemon would realise it flavour it well.

This is a great recipe to make ahead. It sits well for three days as long as you haven't topped it with anything.


Buttermilk Lemon Panna Cotta with Balsamic Strawberries
Serves 4

Ingredients
1 cup low fat cream
1 cup milk
2 tblsp vinegar/lemon juice
zest of one lemon
1/2 cup sugar
1 tsp vanilla extract / balsamic vinegar
11/2 tsp gelatin
2 tblsp cold water


For the strawberries

200 grams strawberries hulled
2 tblsp sugar
2 tsp chocolate balsmic vinegar


Method

1. In a bowl mix together the milk and vinegar or lemon juice and keep aside to slightly curdle.
2. In a small saucepan add the cream, lemon zest, sugar and vanilla. Bring to a boil. Keep aside to infuse.
3. In a small bowl measure out the gelatin and top with the cold water. Set aside to bloom
4. After half an hour, mix together the curdled milk/ buttermilk mxiture with the cream mix.
5. Meanwhile heat the gelatin gently and add to the cream mix. Stir well.
6. Strain and pour into individual bowls.
7. Let it set for 3 to 4 hours.
8. For the strawberries - wash and hull the strawberries, chop into slices.
9. Add the balsamic and sugar and mix well. Let it sit for atleast half an hour,before topping the pannacotta with the berries.
10. Serve cold.


Dessert I Roasted Cocoa and Chia Seed Pudding

$
0
0


I know what you're going to ask me: what in the world is roasted cocoa? It's exactly what you think - slow roasting cocoa powder in the oven, so that its flavours deepen and the result is a beautifully deep dark powder.

I've obsessed with roasted cocoa ever since I read this Dan Lepard piece in The Guardian  where he explains all that happens to the cocoa powder when it's roasting. 

The trick to roast cocoa, is not to be afraid. It's like making caramel, so there's a fine line between things getting burnt and the powder getting roasted. But don't worry, trust your instinct. You'll know where to stop. 


Now that I've been roasting cocoa for over a year, I've made roasted cocoa cakes and cookies, all of which just turn out so deep and moreish that I can't help but making it over and over. This time after roasting a batch for some cake, I had some leftover which I decided to make into a low fat low calorie pudding. 

And it worked. This pudding is so easy to make and can totally be kept in the refrigerator for a few days. It works as well with Stevia or Splenda as it does with sugar, so really you can pick.  And it's eggless! 

I added some Chia seeds to it because they were in my line of sight. I think  mashing a banana into it would make it even better or some caramelised walnuts. What ever you do, do top it with some low fat cream for a dessert so decadent and delicious, you'll thank me later.


Roasted Cocoa and Chia Seed Pudding
Serves 6

Ingredients
1 1/2 plus 1/2 cup low fat milk
1/3 cup roasted cocoa
1/2 cup sugar
2 tblsp corn starch
1 tsp vanilla extract
3 tsp chia seeds
1/2 cup water
Sweetened whipped cream
extra Chia seeds for serving

Method

1. In a small bowl mix the Chia seeds and water and keep aside.
2. In a large saucepan add 1 1/2 cups of milk, sugar and roasted cocoa and mix well. Bring to a boil. Let it simmer. 
3. Meanwhile mix the cornstarch with the remaining milk and make a thick paste. Add this gently to the cocoa milk mix.
4. Let the cocoa mix thicken, add the vanilla extract to it. Turn off the heat and add chia seeds into this mix. 
5. Pour into individual serving bowls/glasses and set aside to cool for three to four hours.
6. When you're ready to serve top with whipped cream and sprinkle chia seeds over it. 


Review I The Winter Menu @ Le Bistro du Parc

$
0
0


Every once in a while you get to eat a meal that you cannot stop talking about. And every once in a while you have the option to eat a meal with someone who loves food as much as you do.

Which is why the meal at Le Bistro du Parc this time round was special. One, the weather was spectacularly dreary and two, we hadn't caught up in a year.

So can just imagine the gastronomical delight that we were both in for. As she took in her surroundings, the quaint restaurant's menu which was written on a blackboard was propped up for us to read.


We chose somethings that we couldn't wait to try - the Mushroom and leek veloute with goat cheese and the carrot sponge with vegetable maki also with goat cheese - not that we meant to be vegetarian but just chose to eat more veggies before we decide on our entrees.

Beautifully presented, we got a plate of the house special - the chicken liver pate with pear coulis first. As delicious as it was, we knew that if ate this one big started we'd end up eating nothing at all. So we nibbled on the pickled cucumbers and ate the coulis instead of smothering it over a piece of toastie.


The Mushroom and Leek Veloute was like drinking silk. So velvety and so smooth this was a brilliant appetizer option to opt for.  The Carrot Sponge in the meanwhile was strangely very light and the foamy goat cheese was an excellent topping. The savouriness of both the ingredients made it quite spectacular because the carrots also brought in a hint sweetness with it.


Next up was the pan fried calamari. Which was by far our most favourite dish that day. Almost made in the style of a dry-tossed pasta, it was chock-ful of olives and tomatoes and beautiful garlic. It tasted light and heavenly and was so easy on the tongue.

Our mains included the tomato and mozzarella tart with caramelised onion with sauteed spinach, a fillet steak with beetroot medley and sweet potato cigar and the steamed black pomfret with mustard greens.


My favourite was the tomato tart. I love love love caramelised onion so this was a winner from the word go. The tomato too had been beautifully roasted and imparted a sweetness to the mozzarella and I just couldn't stop eating it.


The fillet steak was also excellent. Done to medium, it was beautifully succulent and almost melted-in-the-mouth. I loved the beets that came with it and wished they were slightly more so I got them in each bite.

The pomfret was the least favourite of my mains. I found the flavours extremely overpowering, somehow the mustard greens did not work for me at all.


We were already stuffed to the gills when we went ahead and ordered dessert -Valrohna Chocolat Rocher, Poached pear with vanilla cream and caramel sauce and Banana Pistachio Dacquoise with home made marshmallow.

Of course the chocolate was stellar. You cannot have a bad dessert if you're using Valrohna but what blew me away was the Banana Pistachio dacquoise. It was like eating a banana split without all the ice cream hassle. And the marshmallows, oh the marshmallows - bruleed and delicious with a tang from lemon.


All in all, this was an extremely memorable meal. We talked 19 to a dozen and ate till we were ready to burst, In the end, it was all about good food and great company.


Baking I One Pot Chocolate Buttermilk Cake

$
0
0


Have you ever felt this overwhelming need to bake? Or just create something that gives you instant gratification?

I have. And very often because I'm running super short on time, I just want to bung everything into a bowl and just get it all done and over with from start to finish in under ten minutes.

The thing is, somedays I crave a good old fashioned cake so bad, that I have to do with watching an old Nigella Lawson episode or find one with Heston Blumenthal. Other days, I am content just stirring the pot and making something yummy to eat on the stove.

But there are some days where I just have to get something into that oven. With barely anytime to spare I am looking at doing something quickly. Super quickly.


This cake is something like that. It all starts with some buttermilk. And if you don't have buttermilk handy in the house, with some milk and vinegar. All you have to do is stir in all the liquids together and top with all the dry ingredients and give it a quick whisk. Pour into a tin, bake while you watch a rerun of a soap and by the time you know it, the cake will be done.

There's only one piece of advice that I will give about this cake. Use good quality oil. If possible use Olive Oil versus any other kind, but regular cooking oil will also work.

Oh and don't over mix - otherwise you'll end up with a very dense cake - just some light mixing will do. And then a bit of love to make it an amazingly moist easy to eat yet decadent cake.


One Pot Chocolate Buttermilk Cake
Serves 8

Ingredients

1/2 cup milk
1 tsp vinegar
1/2 cup oil
1/2 cup hot water
1 egg
1 tsp vanilla extract
1 cup whole wheat
1 cup sugar
1/2 cup cocoa powder
3/4 tsp baking soda
1/2 tsp baking powder
1/2 cup chocolate chips

Method

1. Take a large bowl and add the milk and vinegar in it. Let it stand for five minutes while you collect the rest of the ingredients.
2. Add the egg into it along with the vanilla and oil.
3. Add hot water.
4. Throw in all the dry ingredients and whisk well once.
5. Stir in the chocolate chips.
6. Pour into a prepared pan that has been lined with parchment paper. Bake at 180 degree in a pre-heated oven for 40 to 45 minutes,
7. Cool and frost as per your hearts desire


Review I The Pop Up

$
0
0


This is going to be a super short review only because I didn't spend as much time as I'd have liked to in a new restaurant and was in and out in about an hour.

Also it was an extremely depressing day - cold, grey and raining, and the dimly-lit interiors only depressed me further.

Let's start with what I liked about The Pop Up. The concept is such fun. A restaurant pops up in the middle of the city for 90 days and then either appears at another location. (Apparently it's going to Goa next). Which is why the minimalistic decor with strings and odds and end and old furniture only adds to the charm. I loved the chalkboards all over the restaurant and the brown paper mats. The menu is easy and quick - lots of grills, lots of veggies.

Here's what I didn't like about the place - the service. Pretty sad. I am normally not one to diss the service staff, but it was rather disappointing. I don't know how they managed this but they were inattentive and intrusive at the same, quite strange no? Oh and the dim lights at 12 noon. I mean,come on - either let the sun stream in or turn up the lights - otherwise it retains that sleazy Tonic (the bar that it replaced) feel.

The menu sounded so promising. But the food had its hits and misses.

As soon as you sat down a freshly baked bread and some tomato jam and chilli oil made its way to the table. So fab, I loved both the bread and the jam. And we went on to the meal almost immediately.


I loved the baked brie that arrived at my table first. It was delicious and gooey. Served with a portion of a greens on the side and some fig jam and some toasties, only thing missing was a nice drizzle of balsamic reduction. Otherwise it was just perfect.

Next up was the Chilli Chicken strip dusted with rice flour and served with a side of vegetables such as green bell peppers and spring onion. Highly highly missable. Yes, they were trying something different but the result was an extremely oily and overpoweringly spicy dish. The chicken strips were not crispy and with each bite you felt you were swallowing a teaspoon of oil.

We'd ordered a warm winter vegetable salad with Kalari Cheese (a ripened Kashmiri cheese). This was really quite delicious - caramelised carrots and sweet potatoes and even some yam. So yum! And it was warm, quite the thing to hit the spot.

For our mains we ordered the garlic risotto and the bacon and cheese doh'nut burger. We loved them both! The risotto was light and easy on the palatte and flavours of roasted garlic shone through beautifully.


But the star of the afternoon was definitely the burger - a savoury doughnut stuffed with creamy chicken and dusted with bacon bits and parmesan. Honestly to-die-for. The doughnut in itself soft and chewy and had a hint of sweetness which made it quite delicious. Oh and the thick cut fries. Just perfect.


It was so good, that we ended up ordering the vegetarian version of the same  - with mushrooms and that did not let us down at all.

Finally, dessert time - we ordered the carrot cake and the berry crumble with ice cream. A word of advice for those who love carrot cake - DO NOT ORDER HERE, It was perhaps the worst possible cake I've ever eaten. It was burnt, fallen and eggy - and I have no idea why in the world the chef would send something like this out.


The berry crumble was soooo much better. It had lovely tart berries masked in a crisp of the crumble and served with Vanilla ice cream it was so delicious.

Here's what I have to say to the peeps at The Pop Up. I know you're here for a short while, but please please pay attention to the basics. The goodwill will go a long way.

For others, go to The Pop Up for a fancy sounding menu and SOME good food. Otherwise catch it in Goa, where I think it'll be sunnier and so much nicer.

Food Festival I Rivaayat: Traditional flavours of Awadh, Hyderabad, Amritsar and Delhi. At The Oberoi, New Delhi

$
0
0


A food festival curated well is a thing of beauty. Atleast, I believe that strongly.

A good chef. A well thought-out menu. And a meal that is unforgettable - that for me is a good food festival.

Which is why Rivaayat at the Oberoi checked all the boxes for me. The group, as a whole, is going back to the roots and bringing back traditional cooking.Curating a series of festivals under the umbrella of Rivaayat has allowed them to explore cuisines from various parts of India - awadh, hyderabad, old Delhi. This then will be carried forward to all the Oberoi brands where people can sample some of the fabulous things that they have tried to revive.

On the night that Himanshu, Sangeeta and I were invited, we got to sample food from Old Delhi and Amritsar. The smiliest chef ever- Chef Arun Mathur had carefully picked out our meal.

As we sat down for dinner, beautiful bread baskets were placed in front of us. One of the things in the bread basket was this hard roll which was just so fantastic. It had a beautiful crust on top and was airy and light inside. I couldn't stop eating it. It was just that good.

And ofcourse it had to come from the Patisserie. The Oberoi Patisserie is a legacy and for good reason. Almost anything that comes out from that bakery of theirs is just scrumptious.


Back to Rivaayat - our meal started with a selection appetisers from the exclusive menu - Amrtisari Machchi and Talli Murgh followed by Chonk ki Tikki.

While all three were fantastic, the clear favourite was the Amritsari Machchi. The fish had been deep fried in a light batter and was moist while bursting with flavours. You could feel that hint of caraway and the tang at the back which just made it so special.


The Talli Murgh was a splendid version of fried chicken. Chef Arun also gave us the story as to how they went into the bylanes of Old Delhi and understood the traditional marination and how they cook the chicken. I had really enjoyed this too.

The Chonk ki Tikki had beautiful fresh peas and ginger in them. I love my peas and potatoes so this was a win-win for me.

For the mains we were served Nihari Gosht, Rahra meat and Dahi-wala chicken. I loved the Nihari. It was so delicately spiced. The shorba that came with it was so flavourful that I couldn't stop licking the plate. And the best part, it was surprisingly light and oil-free.


The Rahra meat came a close second. The meat was so tender, the spice rub so heavenly that I wish I could have taken some home for later. The Chef told us that real reason it was called Rahra was because "usko itna ragadna hota tha ki woh mulayam ho jaye," that you pulled the meat so much that it became completely tender.

The Dahi-wala chicken reminded me of something my father used to make all the time, Which was lovely. But given a choice between mutton and chicken, I'll always opt for the former.

Next up  we ate Saag Kofta and Maa Chole Ki Daal.  Himanshu looooved the daal, it reminded him of home, and I think for the rest of the meal he was supremely nostalgic. Served with an assortment of bread - Khameeri and sheermal - which were both fantastic,

Now, here's the thing, I'm neither a kofta fan nor a daal fan. But both the dishes were delicious. The saag kofta was made with minced chicken and delicately spiced, the saag which was a mix of mustard and spinach was just the best. That I could have eaten plain for sure. While the daal was so wholesome that you could taste the ghee in it. Totally divine.


We ended the meal with two desserts - Guletthi - a cross between rabri and phirni and Carrot Halwa. I preffered the Guletthi, although, might I add, that even though I have a terrible sweet tooth, it was really too sweet for me too. But I loved the undertones of rose and beautiful flavours pistachio that came through,

And then some mint tea was brought out. It was the perfect finish to a great meal. A meal that I wish I could eat this week too


Baking I Chocolate Chilli Cinnamon Chip Cookies

$
0
0


My friends spoil me. Yes they do. Because they know how much I love food which translates to new ingredients and anything that I haven't tried before.

So from their travels I might get a bottle of fabulous fig mustard, or a jar of truffles or a tube of wasabi. From others I might get 10 boxes of fabulous cocoa because they are moving cities or then there are those who know that the best gift given to me ever, will be edible.

Like my husband for example - this birthday I got fabulous macarons from Paris and the most delicious selection of cheese. That's how I brought in my birthday - with so much cheese.

So when Deeba gave me a packet of cinnamon chips, that I had only casually mentioned to her (something that her husband could bring on his travels to the US), I was ecstatic. These little nuggets of goodness are unfortunately only available in the States and are one of the best things that have happened to mankind.


I couldn't wait to try my hands at baking with them, that is, if I could stop popping them into my mouth like happy pills.

I wanted to make something simple and easy. And that I would have enough chips leftover to make something else as well. (I am greedy that way you know)

I had everything to make a bunch of cookies. I decided I wanted dunkable cookies - something that could be dipped into a nice cold glass of milk. I figured that thicker cookies would keep it sturdier for a longer time, and so that's what I did.


I added a bit of cayenne pepper into the cookies so that they offset the spiciness from the cinnamon and I cannot tell you how delicious these cookies tasted with this little twist. Spicy sweet with a hint of saltiness and yes chocolate!

I suggest you bake these for barely 12 minutes, because then you get a cookie that is chewy on the inside and has loads of texture.

And if you don't have cinnamon chips - just double the chocolate chips and make yourself a divine chocolate chilli cookie!


Chocolate Chilli Cinnamon Chip Cookies
Makes 16

Ingredients
100 grams butter
3/4 cup sugar
1 egg
1 cup whole wheat flour
1/8 tsp baking powder
1/4 tsp salt
1 tsp cinnamon powder
1 tsp cayenne pepper/ (if you are using chilli powder use 1/2 tsp only)
1 tsp vanilla extract
1/3 cup chocolate chips
1/3 cup cinnamon chips


Method

1. Soften your butter and in a bowl whisk in all the sugar.
2. Add the egg and vanilla extract to it and whisk well.
2. Meanwhile sift your whole wheat flour, baking powder, cinnamon powder, cayenne pepper and salt together. Keep aside
3. Add all the dry ingredients into the butter mix and mix well. Tip in all the chips and give it a good rest. Let this dough rest for 10 minutes before you proceed to the next step.
4. Use your hands to make even balls with the cookie dough. Arrange them into your cookie sheet. Using a fork, flatten your cookies as much as you'd like.
5. Bake for 10 to 12 minutes at 180 degree centigrade.
6. Cool completely before eating.


Contest Alert & Gadget Review I Mexican Kidney Bean and Nacho Soup with the Philips Soup Maker

$
0
0


The good people from Philips sent me their new gadget the Soup Maker, so I spent the whole weekend trying to figure out all the magic it could do. 

What does a Soup Maker do, you might ask - and in their own words "The Philips Soup Maker HR2201  is a unique combination of a boiler & a blender that perfectly blends and cooks deliciously healthy soup in minutes. Designed for ease of use, Soup Maker makes deliciously healthy soup in minutes, as it steams and blends the vegetables together, saving time and keeping the nutrients intact."

So fun! Basically it means that it can blend stuff while its hot and thereby saving lots of time in the kitchen. And as an added plus, it can also blend super cold things - making smoothies, froyos accessible and easy. 

I made a lot of fun soups with it - chunky soups, blended soups , cold soups and then decided to figure out what I really wanted to do with it. These soups are made in under 30 minutes including the prep time for chopping the vegetables. Not bad on days where you are completely out of ideas and just want something quick and easy. 


To start the review, I decided to make a combination of a blended and puree soup to see how it works. I zeroed in on a tortilla soup, and then decided to use up some nachos that were lying around the house instead. 

So on the one hand, I made a spiced pureed tomato soup as the base in the Soup Maker, while I prepped for the chunky bits and then threw in the veggies and the kidney beans and set it on chunky mode. The result? a beautifully fragrant soup that could be eaten plain.

Ofcourse I embellished the soup with some sour cream, spring onions and nachos, but eating it just plain was wonderful as well. You'll find the recipe below.


**CONTEST ALERT**

Now, here's the thing. I'm running a contest for all things soup all of February. All you have to do is 

1. Leave a comment with your favourite soup recipe as a "Comment" on my blog 
2.  Like my Facebook Page. Click here

And you'll stand to win, a Philips Rice Cooker!

I will make the best soup out of the lot and post on my blog with due credit to the person.

The contest is on till February 28, 2015 and the winner will be announced on the first week of March. So participate now! The contest is open Pan India.


Meanwhile,

Here's the recipe for this delicious soup. I know it seems like a long list, but trust me it's really quite simple and delicious to put together. Give it a try

Mexican Kidney Bean and Nacho Soup
Serves four


Ingredients

For the tomato base
6 tomatoes roughly-chopped
2 cloves of garlic -roughly chopped
1/2 tsp cumin powder
1/2 tsp coriander powder
1/4 tsp cinnamon powder
1/2 cayenne pepper
1/2 tsp salt
500 ml of vegetable stock or water
(if you have a stock cube then nothing like it)

For the chunky section
1 tso butter
1 onion
4 cloves of garlic
1 carrot
1 red bell pepper
1/2 cup sweet corn kernels
1 cup boiled kidney beans (rajma)
1/4 tsp cayenne pepper
1/4 tsp cumin powder
salt to taste

For the toppings
Sour cream
Spring Onions
Grated Cheese
Nachos
Lemon
Coriander


Method

1. In the Soup Maker add all the ingredients for the tomato base. Set it on to the "Smooth" or "Blended" soup selection.
2. Now, go about making the chunky bits. Chop the onions, garlic, carrots and bell pepper into equal sizes.
3. In a saucepan, add the butter and add onions and garlic to it and saute well. Add carrots, bell pepper, corn and kidney beans and saute with salt and spices. Set aside.
4. As soon as the tomato base is done - about 20 minutes - add the sauteed veggies to the Soup Maker. Set it on to "Chunky" and let it cook for only 10 minutes.
5. Adjust for seasoning.
6. Ladle into bowls and give with a range of toppings. According to me it tastes best with a squeeze of lime, a dollop of sour cream  - you can use yogurt instead and crispy nachos.


Winter Menu Review I Guppy by ai

$
0
0


The menu has always been simple at Guppy.  Fresh flavours, clean plating and fabulous food that’s been the mantra forever. Keeping that in mind, the winter menu is all that and more.
We started our meal with Chicken Suimono ,clear chicken soup with root vegetables and chicken dumpling that was served in a tea pot.  Steaming hot, it really warmed us from the inside. But what was really fantastic about this soup was the broth – flavourful and light – it was delicious, and I was happy to keep sipping on it.


As we waited for our salad - Snow peas and mushroom in a sesame dressing, Edamame beans were brought out, and as always, that had the most perfect snap. The salad was so pretty that it was hard to eat. The punch from the sesame worked very well with the mushrooms and the corn and the beans really added a nice texture to the salad.


Crispy soft-shell crab came next – fried in a batter that had been lightened with some nitrogen – and it was A-mazing. Crispy and soft at the same time. Served with wasabi mayo this made for a delicious starter.

Of the Sushi we ate both Shake Maki or the Scottish Salmon sushi and the kappa Maki or the cucumber maki – both excellent.


Up next was the Nasudengaku inspired aubergine grilled – and was perhaps the best thing that afternoon. Pureed aubergine with onions, garlic and miso, it was like umami in a soft eggplant. Absolutely spectacular.


But this was overshadowed by the beetroot and plump avocado tartar. Delicious fresh flavours, the citrus dressing just made this spectacular.

We finished our mains with the Chicken Katsu Curry – A Japanese style curry that was light and easy on the palate with remarkable notes of warm spices. Served with sticky rice, a beautiful finish to a good meal.


For dessert we ate the warm apple and prune pie which was served with berry coulis. And Blueberry crepe with seasonal fruit flambe. I’d say eat the pie and forget about the crepe.

All in all, a beautiful meal in a beautiful setting.


Oh and don't forget to participate in the Soup Contest on my blog. All you have to do is leave a recipe of a soup and you'll stand to win a Philips Rice Cooker. Read more here.

Masterclass I Learning Thai @ Neung Roi in Radisson Blu Plaza

$
0
0

I love Neung Roi. (Read the review here). But you probably knew that already.  I love love love their salads. The Thai Pomelo Salad is out of the world. As is the Winged bean salad. So imagine getting a chance at actually learning these yummy things.

Called Thai Masterstrokes, the people at Neung Roi, Radisson Blu Plaza Mahipalpur organised an amazing Masterclass that included a handful of bloggers. We got to learn some spectacular dishes including Pla Yang Kami or the grilled sea bass, Gai Kaprow  or the stir fried chicken with basil and chilli, Yam Tuea Plu  or the winged bean salad, Tom Kha Gai or the chicken and coconut milk soup and finally Tub Tim Krob or the water chestnuts in coconut milk.


Chef Yenjai is a fantastic teacher. She’s funny and she’s patient and she’s incredibly nimble. Two hours just flew as she taught us all these fantastic things. She even gave us fantastic tips on how to keep the aromas in all the dishes, which are the good brands to use in the kitchen and ofcourse on plating.

After the class we got to sample all that was on the menu and more. Some grilled mushrooms, pad thai and that delicious Thai Pomelo saladwere also brought to our table.

 Deeba and I opted to eat the Tom Kha Vegetarian, which might I add, is the best soup in the world while the others drank/ate  the chicken kind.


As we ploughed through the salads and mains, we also had the options for dessert – coconut ice cream, tub tim krob and the sweetened pumpkin. I was in heaven.

By far this was one of the funnest bloggers event we have done in a long long time. There’s truly nothing better than good food and great company.  

Image Courtesy: Deeba Rajpal
Oh and don't forget to take part in the Philips Soup Maker Challenge. The winner will get a Philips Rice Cooker. All you have to do is follow the instructions on this link.

Baking I Alice Merdich's One Pot Cocoa Brownies

$
0
0


I love a good brownie. I love a good brownie so much, I can forgo food for the day and eat that sheet of brownies that I have just baked through the day.

And because I love a good brownie so much, I am always trying out new ones. I’ve made Rocky Road Brownies, Triple Chocolate Brownies, Hot Chocolate Brownies, Dark Chocolate Brownies with cherries and almonds and Fudgy Brownies.

Ofcourse I tweak original recipes aplenty but I think I have finally found THE ONE.

The one brownie that you cannot stop eating.

The one brownie that can be made with just pantry staples and no special ingredients required.

The one brownie that required just one pot and a whisk.


These are Alice Merdich’s Cocoa Brownies. So fabulous. So easy. And so so delicious.

It’s all about the chemistry between the cocoa and the butter and the flour. And whisking it 40 times over.

I mean that’s the instruction these brownies come with. Once the cocoa butter and sugar are melted together and the eggs and vanilla added in, you have to whisk in the flour and then beat it 40 times over. I think it activates some gluten, which allows the brownie to be crisp on the outside and nice and chewy on the inside.

I don’t with the microwavable or double boiler instruction. I just use a heavy bottom pan which I bunged on the gas, melted the butter, turned it off, stirred in the sugar and cocoa until it cooled and then added the rest of the ingredients. It was like one pot magic!

Low effort yet packed with a chewy fudginess that you only get with a top class brownie. These have to be made now!


One Pot Cocoa Brownies
From Alice Medrich’s Bittersweet

Ingredients
140 grams butter
1 1/4 cups granulated sugar
3/4 cup plus 2 tablespoons unsweetened cocoa powder
1/4 teaspoon salt
1 teaspoon pure vanilla extract
2 large eggs, cold
1/2 cup (63 grams) all-purpose flour

Method:
1.Preheat oven to 180 degree centigrade. Line an 8″ square pan with parchment paper so that there is an overhang on two sides.
2. Combine the butter, sugar, cocoa, and salt in a large heavy bottom pan and put it on the burner. Stir from time to time until the butter is melted and the mixture is smooth and hot enough that you want to remove your finger fairly quickly after dipping it in to test. 
3. Remove the bowl off the fire and set aside briefly until the mixture is only warm, not hot.
4. Add the eggs one at a time, stirring vigorously after each one. Using a wooden spoon, stir in the vanilla. 
5. Once the batter looks shiny and well-blended, stir in the flour until no streaks remain. Vigorously beat the batter for 40 strokes. Spread the batter evenly into the pan.
6.Bake until a toothpick in the middle comes out slightly moist with batter, 20 to 25 minutes Remove and let cool completely before lifting out of the pan and transferring to a cutting surface. Cut to your desired size.


Oh and don't forget to take part in the Philips Soup Maker Challenge. The winner will get a Philips Rice Cooker. All you have to do is follow the instructions on this link.


New Menu I Pan Asian at ITC Sheraton

$
0
0


I’m not a big fan of Chinese food, no matter what province it is from. I especially don’t like indo-Chinese food since I find it pretty greasy and I feel the flavours are all the same.

So you can imagine my apprehension when Pan Asian at ITC Sheraton asked me to come by and check out their new menu. I've reviewed them before and you can read all about that here. Ok, so I know Pan Asian means all things Asian, I was fairly sure I’d be stuck eating a lot of Chinese.

How wrong could I have been.

Divvied up into categories such as Chinese, Japanese, Thai and the rest of Asia, the new menu is a treat to look and read. I, ofcourse made a bee-line for the Thai and Japanese flavours while my companions couldn’t stop gushing about the Chinese menu.


We started our meal with some soups and salads – Suan Rong Shu Chai or the Chinese Vegetable Clear soup and Miso Shiru, the miso soup as well as Som Tam or the Raw Papaya Salad and the Monkey Head Mushroom in Chilli Vinegar Sauce.

Both the soups totally hit the spot. The broth of the clear soup was extremely flavourful. It was light on the palate and had a delightful tangy flavour. The miso soup was just perfect as well. The umami from the miso shone through and the pillowy soft tofu was just perfection in each bite.

The Som Tam was a bit of a miss for me. It was far too heavy on the lemon and really light on the peanuts. It didn’t have the right balance of crunch, sweetness and sour for me. I also wasn’t too hot on the presentation, having just eaten spectacular Som Tam at Neung Roi.


The mushroom salad however was a revelation. The earthy flavours of the mushrooms really paired well with the chilli and the vinegar and I could eaten this the whole night.  I also loved the presentation and the effort that the chef had put in it.

Chef Vaibhav also brought out a Micro Green salad for us to sample.  What a fabulous salad. He’d used seasonal cape gooseberries and figs alongwith the micro greens which had been dressed in sesame and tamarind. I loved how fresh it tasted and how easy it was on the palate.


Next up, we’d ordered the some sushi – so out came Mixed vegetable Maki and the salmon maki.  You can’t fault the sushi at Pan Asian, Chef Nakamura is a legend and the sushi just lived up to its reputation of being stellar. Meanwhile we’d also ordered the spinach and waterchestnut bao, which was really quite excellent. The bao was soft and squishy slightly sweet while the filling was sharp and had a lovely crunchy texture thanks to the water chestnuts.

Age Dashi Tofu– deep fried tofu with light soya sauce  was a delight, and it was served with a lovely satay sauce. The Wasabi prawns were excellent. The crisp coating, almost like a tempura batter really worked with the pungent sweet wasabi mayo and I could have eaten atleast a dozen of these babies.


Obviously we had no space for anything now, but since we had to try some of the mains, we had the Pla Neung Rad Prik or the steamed sea bass with thai minced chilli as well as the vegetarian fried rice. This was my least favourite dish. The fish was too fishy for me – I suppose that was because the skin was on while the birds eye chilli sauce was way too spicy and too sour and did nothing for the  fish. I honestly wish I hadn’t ordered this at all.

The fried rice though was delicious, and I could easily go back to just eat a bowl of that rice.


For dessert, the chef brought out a sweet gyoza or dumpling filled with dried fruits and nuts which he served with some ice cream and berry compote. It was quite an interesting dessert but I wish I could have finished my meal with some good Pan Asian dessert such as Mango sticky rice or even a coconut ice cream.

All in all we enjoyed our meal and will definitely be going back for some Thai and Japanese flavours. 

And don’t forget to take part in the Cookaroo and Philips contest to win a Philips Rice Cooker. Click here for more details. 

Vegetarian I Thai-spiced Carrot and Citrus Soup

$
0
0


I can’t claim to love soups but if someone hands me over a cup, I’d be happy to drink/ eat it. Truth be told, I grown up eating a lot of strange soups made from whatever vegetables that my grandmother or mom could find in the fridge.

As I grew older, my palate obviously became slightly more refined, so I could distinguish one vegetable from the other.  I knew when the combination was of bottle gourds, tomatoes, onions and potatoes or when pumpkin carrots and onions had been bunged in together.

I definitely did NOT dig these soups.

The older I grew, the choosier I became. Especially since I had discovered a whole range of Thai soups that I could not get enough of. Even now my favourite soup remains the Tom Kha.

What I found to deal with however, was the mess with all that puree. You had to boil your vegetables, wait for it to cool down and then puree and heat again. The Philips Soupmaker really changed all that for me. And you can read the review here.


The Soup maker has done two things for me – much less mess and much less time consumed to make a soup. And I love these things about it.  The last time around I made a chunky soup with the machine, this time I decided to make a smooth  and blended soup.

This soup uses a bit of Thai curry paste and some peanut butter to give it those lovely Thai flavours. You get the aromatics from the lemon grass and kaffir lime leaves without actually having to go and look for these ingredients and the addition of the peanut butter makes it creamier and gives it a mellow nutty flavour to it.

Of course if you don’t have Thai curry paste, I’d suggest you get at least lemon grass for this soup,  otherwise you’ll  miss those flavours. I’ve used orange juice for the citrus part of my soup but you can just as easily add a bit of grapefruit or lemon or tangerine.

This is a very wholesome soup. And despite so many flavours, the carrot really shines through and makes for a great meal for dinner.


Thai-spiced Carrot and Citrus Soup
Serves 4

Ingredients
4 large red carrots
500 ml vegetable stock or water
1 tsp Thai red curry paste
1 tblsp smooth peanut butter
½ cup orange juice
Salt to taste

Method
1.       Peel and chop the carrots roughly. Add  it to the soup maker.
2.       Add the stock or water to it along with the Thai red curry paste and the peanut butter
3.       Set it to the blend mode and wait for 20 minutes till the soup is ready.
4.       Once the soup is blended adjust for seasoning and add the orange juice to it.
5.       Serve hot.

And don’t forget to take part in the Cookaroo and Philips contest to win a Philips Rice Cooker. Click here for more details. 


Viewing all 212 articles
Browse latest View live